Cork wall decoration: installation features
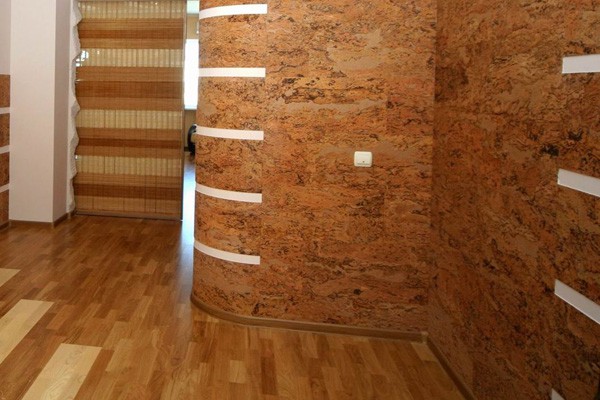
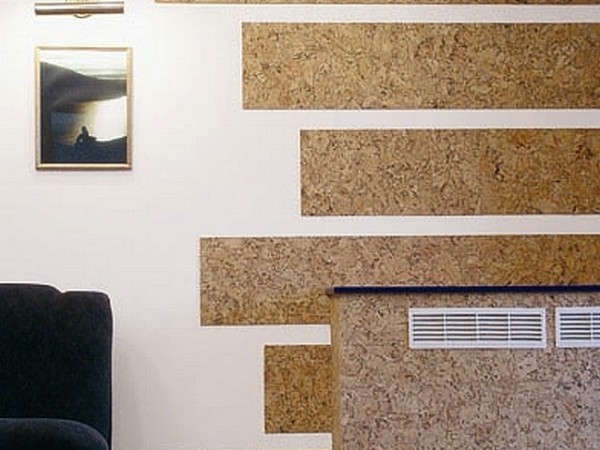
Cork material is increasingly gaining popularity in modern repairs, as it has the widest range and is often used in interior decoration of any complexity. Cork wall decoration will provide excellent thermal and sound insulation in the room.
The content of the article
Material Features
The material is mainly produced in Portugal from cork oak bark, as the country owns 1/3 of the plant. In the CIS, the plant can be found in the Caucasus and the Crimea.
Finishing with cork wall panels and other similar types of material differ in some properties:
- Moisture resistance.
- Environmental friendliness.
- Reliability and durability.
- High rates of thermal and sound insulation.
- Increased resistance to deformation.
- Excellent exterior aesthetics.
- Resistance to decay.
- No static charge builds up.
- Confrontation against gases and harmful odors.
- Not toxic and fireproof.
- Lowers the level of electromagnetic radiation.
- The ability to do the installation yourself.
Note. Before finishing the walls with cork panels, you need to determine the type of material and learn more about the structure.
So:
- A sheet or plate consists of one or more layers that are carefully sanded. As a protective material, varnish or protective wax is used.
- Cork sheets are available that are interspersed with a decorative character. There are also conventional painted sheet options.
- For bathrooms and other rooms with high humidity, wax coated material is used. Also, not only wall decoration with cork panels is made, but also ceilings and cork plates are used.
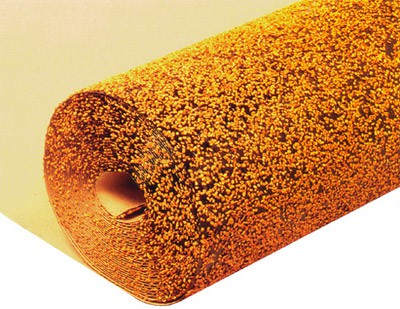
- The sizes of the rolls in which the material is sold are not standard and may vary. Cloths are made from pressed cork chips.
A veneer of the same material is superimposed on top.
Note. Finishing with cork tiles is preferable for the user, but still the quality of the canvas is not inferior, but the price is much lower.
- You can often find cork wallpapers for decorating furniture, doors, ceilings and walls. Wallpaper sizes are different, the thickness is from 2 to 4 mm.
The material is a paper base coated with a layer of cork veneer. - But, unfortunately, wallpaper, unlike panels, does not have the proper thermal and noise insulation. The main function of cork wallpaper is decorativeness.
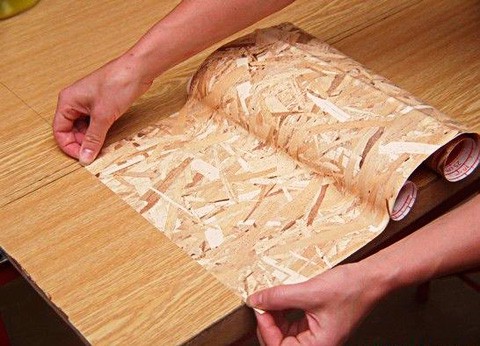
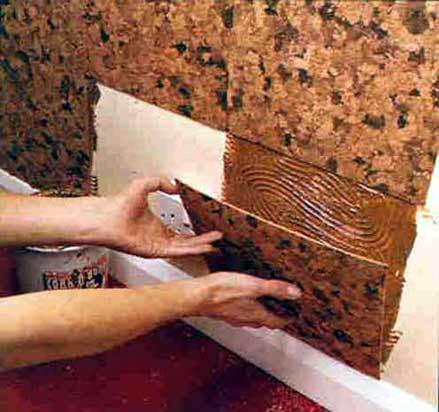
Recently, new self-adhesive cork wallpapers have appeared on the market, the hallmark of which is the presence of an adhesive composition, see photo.
Features of the installation of wall cork materials
The technology for installing cork wallpaper is very similar to sticking ordinary heavy wallpaper. Installation is carried out on a previously cleaned surface.
So:
- Pasting starts from window openings.
- The material is butt-mounted.
- For installation, any glue that is necessary for heavy paper-based wallpapers is suitable.
- Glue is applied by brush or roller.
- Seams are processed with a special roller for these purposes.
Note. For the installation of paintings, a contact adhesive is used, it is applied to both the canvas and the wall.
After applying the glue, it is necessary to withstand a few minutes, after that it can be installed and pressed tightly against the wall.Drying time, at least 2 days, then the ends are cut with a sharp knife or electric jigsaw.
Choose cork material for wall decoration
Before proceeding with the installation, it is necessary to determine correctly with cork material, the choice directly depends on the characteristics of the room and the condition of the walls.
So:
The most commonly used cork wallpaper or cork tiles. But working with each of the types provides its own characteristics, as does the interior decoration with cork panels.
Wallpaper that has a paper backing is recommended to be glued together. Since the adhesive composition contributes to the softening of the canvas, and the material may break during the gluing process.
Tip. The right thing to do is as follows: one puts glue, and the second person helps to level the wallpaper.
So:
- More dense cork wallpaper without a base is quite fragile, it is impossible to do this work with your own hands, even if the instruction is used. It is recommended that you entrust the entire process to professionals.
- For self-decoration, cork tiles or panels are more suitable. This is a polished pressed material with a thickness of 4 mm, the material has a moisture resistant coating.
Sometimes sheets of greater thickness are used.
What is the advantage of modular tiles:
- First of all, these are convenient sizes. Holding it in your hands and working with it is much more convenient than with wallpaper from the same material.
Sizes are found 30x30 cm and 60x60 cm. - The material has reliable protection from varnish and wax. The tile is most suitable for kitchen wall decoration and a bathroom.
Adhesive for modular tiles
So:
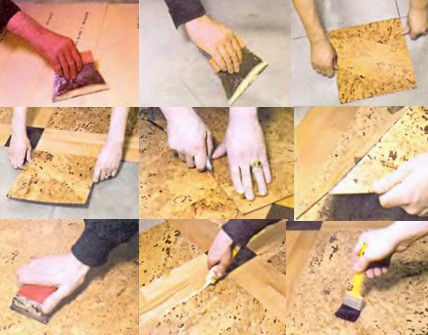
- In order for the adhesion to be reliable with the surface of the cork material, special glue is used.
- Work with the composition has its own specifics:
- Initially, the glue is thoroughly mixed.
- Contact adhesive should be applied to both the material and the surface.
- Contactless adhesive is applied to one of the surfaces.
- Further, it is recommended to wait 20 minutes.
- Then press the material firmly against the wall.
- Check the surface for the result of air and drive it out with a roller.
Note. The glue sticks very quickly, so if the tile is glued unevenly, you need to move it quickly.
- This adhesive composition has an unpleasant odor, so the room needs to be ventilated more often.
- The glue sets completely within 48 hours.
There are several types of adhesive, for the right choice you need to pay attention to the annotation. Some adhesives contain toxic substances.
There are compounds that are designed for surfaces made of metal, fiberboard and cement. First of all, you need to find out the temperature range where one or another adhesive composition can be used.
Mounting the cork on the wall, step by step instructions
Before you finish the walls with cork panels, it is recommended to watch the training video, and we will try to describe the stages of work.
So, for starters, we need the necessary materials and tools:
- Dispersion adhesive.
- The material itself.
- Level.
- Plumb line.
- Mounting knife and scissors.
- Metal ruler.
- Putty knife.
- Capacity for adhesive composition.
- Velor rollers for seams.
Installation:
- Before starting work, you should remove the panels from the packaging and leave them for a day in the room where the installation will be carried out. This event will further avoid deformation.
- Installation is carried out only on a flat clean surface. Therefore, the wall is pre-aligned and primed.
After that, marking is made for the location of the material. - For proper marking, the building level and plumb line are used. Thus, the center of the wall is located, where the first mark is placed.
Next, draw two lines that pass through the center.The lines should divide the plane into equal halves horizontally and vertically. - Then the panel is taken and applied exactly to the intersection of the lines. It is outlined along the entire contour, and a thin layer of glue is applied per square meter.
- The panels are glued gradually in rows, taking into account the protrusion of the previous and subsequent rows.
- After the sticker, it is necessary to go through the material roller so that the joints are reliably aligned. Then corners will not depart in consequence.
- An important point is the decoration and decoration of the corners of the material. To do this, the material is measured and glued with a small overlap on the finishing layer.
For high-quality performance of places where sockets and switches, pre-prepared cardboard templates are used. With their help, preliminary holes are cut.
