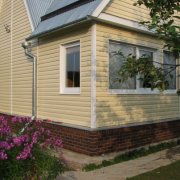
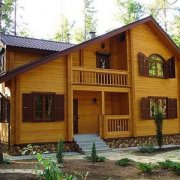
Facing the facade with corrugated board: work

Facing the facade of the house with corrugated board is quite common. Professional flooring for facade cladding allows you to make full protection of the walls of the room from the effects of the external environment.
Preferences in his direction are explained by the environmental friendliness of the material, visual attractiveness, relatively low cost. The installation of this material will be devoted to our article.
You can watch photos and videos on this topic and fully understand how this work is done.
The content of the article
The benefits of finishing this type
System ventilated facade with corrugated board lining has several advantages over other materials that are difficult to dispute.
Sometimes such qualities just immediately make an advantage in his direction:
- The highest quality thermal insulation. Moreover, the material is completely environmentally friendly and does not harm your health ;;
- Excellent noise insulation properties and the possibility of using additional thermal insulation. And you yourself adjust its thickness;
- The impossibility of the influence of external factors on the facade of the building. This significantly increases the durability of the room;
- The facade with cladding from corrugated board perfectly tolerates temperature extremes and high humidity;
- We will not need to do a large amount of work in preparing the surface and will not need to level it. And facing is not required. Profiled itself will be the front of the facade;
- The corrugated board in the facade cladding provides an unlimited opportunity to embody design fantasies that are used to design a unique facade.
- The hinged facade requires minimal investment and in the meantime emphasizes the aesthetics of the building. Here the price is fully justified.
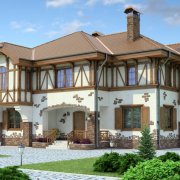
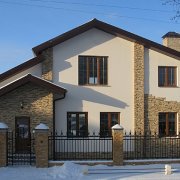
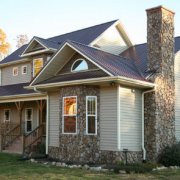
Now such a cladding is widely used not only for objects of an administrative, industrial and public nature, but also for decoration of residential premises; - The ability to do all the work completely with your own hands and without resorting to outside help will significantly reduce the cost of the entire structure;
- Decking is an economical option for designing the facade. The price is facade decoration significantly lower than analogues;
- Mounting it is quite simple, and design ideas give a unique and unique look. These qualities make corrugated board one of the most popular materials on the market.
Attention: When choosing a material, the fate and area of coverage should be. This material is sold with different stiffening ribs.
Therefore, immediately pay attention to this. Consult a specialist here.
We take into account the nuances
When covering with corrugated board, it is very important to take into account the nuances. Today, great attention and efforts are devoted to improving all the characteristics of the object being reconstructed or under construction.
It is now irrelevant to focus on visual data at home without improving operational data. This is very important, because you need to live in the house, and much needs to be done for comfort.
So:
- The technology used in the manufacture of the ventilated facade is undergoing a new stage of improvement.
- For the installation of cladding elements, during the construction of a ventilated facade, a substructure is originally constructed from the metal frame.
- The metal frame should be fastened to the mounting brackets, and after that it is possible to mount corrugated sheets on the frame using self-tapping screws and nails. There is nothing complicated in this and you can cope with the task without special skills;
- The house cladding should contain an air gap. For this, it is necessary during construction to create it between the insulation and corrugated board.
This nuance will ensure long-term operation of the general design of the curtain wall due to air circulation. It will not allow condensate to accumulate and extend the life of the structure; - The bottom line is that trapped moisture will not form condensation under the cladding and spoil the material, and with the help of air circulation will be removed to the outside. Without this layer, moisture will not only act destructively, but will also create favorable conditions for the development of fungus, mold and microorganisms.
In addition, this design will provide sound insulation and thermal insulation. And this, you see, is a big plus.
The technology of the ventilated facade is used in case of insulation during finishing with a metal profile and provides for voids - a technological gap.
Completing of the work
For the cultivation of the facade, various layers are used to ensure long-term operation and high qualities: a vapor barrier, a heat-insulating material, a wind barrier, a frame made of a metal profile or bar and cladding.

There is a specially developed instruction for DIY wall sheathing with professional flooring, which will help you quickly and easily cope with the task.
Surface preparation and marking
Before starting work, you must properly prepare the surface.
To do this, do the following:
Attention: Immediately it should be said that when attaching the lower part of the trim should rest against the paving, and not the ground. If it is not, then you have to do it.
To do this, an extract from crushed stone is done, or any unnecessary stone from the site may come up. After that, it is poured with cement mortar.
- We remove from the plane everything that may interfere with the work. The surface must be completely clean;
- Now do an inspection of the plane. We are not interested in bumps. We are looking at the peeling of material on the surface. If they are, then simply with the help of a hammer and a chisel we eliminate them;
- Now we need to process the plane with a primer. It is commercially available, give preference to deep penetration liquids. Work is done with a brush or spray gun;
- Allow the surfaces to dry completely and make markings. We need to correctly determine the installation line, it should be completely parallel to the ground. To do this, put a mark on the wall;
- Now this point must be moved to other surfaces. To do this, it is best to use a hydraulic level. It is available for sale or make it yourself. It is with its help that you can do all the work in the highest quality. Move the mark;
- Now we need to connect the received points. For this, a simple kapron thread is used. We simply beat the size and connect the marks in one line. Now we have the right installation line.
Frame installation
This part of the work is crucial. The configuration of the entire plane will depend on it.
It must be geometrically correct. Therefore, practically everything is important here.
Attention: For high-quality work you will need forests. You can never do everything right from the usual stairs.
Therefore, they should be installed. Let them be temporary, but you can move freely.

So:
- First of all, the frame is installed. It can be from bars, which must be treated with an antiseptic if it is wooden or profiles. The second option is more durable.
- To install the metal frame, you will need profiles in the form of letters Z, T, G and KKU brackets that need to be attached to the wall. U-shaped profiles are neatly and evenly fixed to the brackets.
The Z-shaped profile provides air circulation between the lining and the insulation and its step should not be more than 100 cm. - Fastening is carried out using dowels. To do this, make a hole in the surface using a puncher and then make the connection;
Caution: Never use the wall plugs from the kits. They will not provide reliable mounting.
Buy separately the plastic and the screws to it, which should be taken a couple of mm more from the hole section. Only such a connection will achieve the quality of fastening.

- We cut the profile in size and make fastening along the drawn line. It is carried out using a punch and dowels;
- So we do the binding along the lower and upper contour. After that, it is worth pulling the fishing line along the diagonals of the harness.
We need it for fastening the transverse profile. It should be placed in the same plane, so the fishing line, this will be a guide; - The transverse profile should be fixed to a height according to the thickness of the insulation mats. Remember, the material must not deform after fastening.
As a result of this, it will lose its properties. Although the connection of the sheets should be quite tight.
Therefore, choosing the installation height is quite important. Provide a gap of a couple of cm, this will ensure proper air circulation and will not allow condensation to accumulate; - This is followed by vapor barrier and laying of heat-insulating material. We cut the film to the desired size and fasten.
Here you need to make the right connection. Never stack sheets back to back.
With an even connection, overlap at least 5 cm. If you attach to the frame, then twist the material a couple of cm;
Caution: The vapor barrier can also be attached before installing the frame. Just see for yourself here. Sometimes it’s difficult to mount onto the film simply on a plane and it is simply attached to the frame.
- After installing the waterproofing, the insulation is attached. Its connection is carried out using building fungi, which should be purchased in advance.
We make a hole with a perforator and after that we drive the fungus with a hammer;
Fixing corrugated board
This is followed by work, which at first glance may seem complicated. In fact, everything is quite simple.
The main thing is that the metal profile is installed at the level correctly:
- Installation of corrugated board includes fixing the corrugated sheet to the frame. Using galvanized screws with a rubber gasket, the corrugated board installed on the profiles is scrolled in steps of 30-40 cm;
- The rubberized gasket protects against moisture entering the holes. To form holes, you need to use a metal drill and a drill;
- The sheet is cut (in the event that it does not fit in its entirety). After that it fits. In this case, in no case can you make connections to the joint. Overlap at least 5 cm;
- After pieces of material, you should always remove the burr, otherwise you risk cutting yourself. Work is carried out only in construction hands.

Caution: Punches and nails must not be used. Their use can spoil all the work. Before mounting, it is best to drill a hole with a drill of a smaller diameter and only after that make a connection.
After the work done, the final stage remains. On the perimeter of the corners of the house, doors and windows, additional elements are installed.
The house takes on a finished look and on this home decoration Do-it-yourself decking is considered completed. News building material should be calculated and purchased in advance so as not to waste time on additional trips to building materials stores.
Thoughtful work entails success. Everything is quite simple and feasible to any person.