Alignment of walls with plaster according to all the rules
Plaster for leveling the walls, there are two types, this is for external and internal surfaces. Each of them has instructions where it is indicated, so be sure to read before buying.
Their application technology is almost the same and how to level the wall with plaster we will tell today. Also on the video in this article, you can understand everything and do the work yourself. Then the price of the finish will not be significant.
The content of the article
Stucco leveling technology
Alignment of plastered walls can be done with simple puttying (see. Aligning the walls with putty in accordance with all the rules) But often the application layer is required quite large, so you must first align the plane and then puttying the plane. The technology of leveling walls with plaster is as follows.
Surface preparation
Leveling and plastering the walls begins with the preparation of the surface:
- To begin with, the entire plane is cleared. It is advisable to recapture all the previous material;
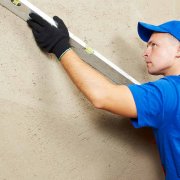
- Now pull the line along the diagonals of the surface.
- We apply a gauge and look at the angle of deviation. Here we will immediately see the desired layer of plaster.
- If the thickness is more than 3 cm. then alignment is best done with drywall.
- If the thickness is about 2 cm, then it will be necessary to align with the start and after that apply the finish layer.
- If the layer thickness is less than 1 cmthen everything can be done with the finish.
Attention: Which plaster to choose for leveling the walls, see the thickness of the layer. If large, then you need a start and finish. If not significant, then you can safely use only the finish.
Beacon Installation
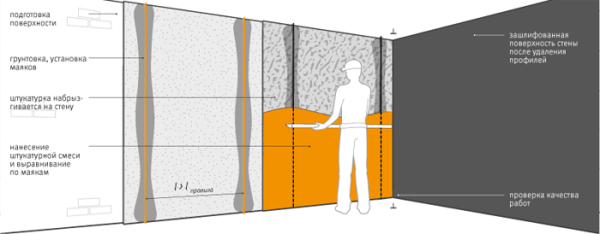
How to level the walls with stucco video you can see everything in detail. All work must be done in one plane. Then we will have the correct geometry of the room. This is done using beacons (see Stucco beacon: types, purpose, installation).
There are two main ways to set beacons:
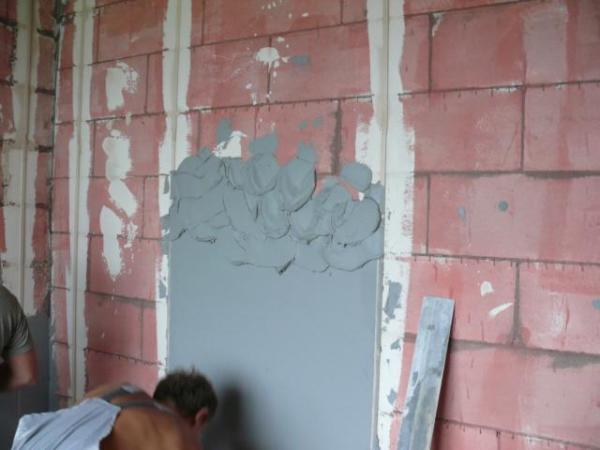
- On a pre-cleaned wall, it is necessary to repel vertical lines, on which 5 mortar sculptures are immediately applied.
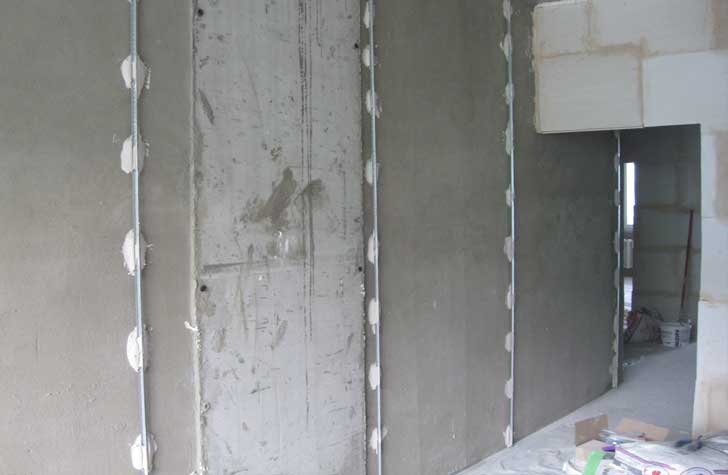
- We take a profile adjusted to the height of the room, a lighthouse, and set it on a broken vertical line, pressing it into the sculptures to a depth. In this case, the solution should exit through the holes on the profile. Using the building level, we check the verticality of the installed beacon. We repeat the steps taken with the second profile, placing it on the other end of the wall.
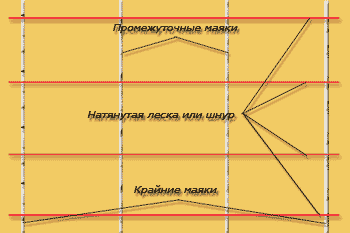
- Next, we proceed to the installation of intermediate beacons. To do this, we stretch the cord between the extreme beacons in three places: from above, in the middle, from below. We install intermediate beacons in such a way that the upper part of the profile touches the stretched cord.
- Lighthouses will be at a distance from each other equal to the length of the tool with which the plaster mixture will be applied. If the length of the rule is 2 meters, then the beacons are set apart by 1.80 meters. After installing the beacons, it is assumed that time is allowed for the hardening of the sculpting solution.
- When plastering for future finishing with facing tiles, it is recommended to install beacons (see Installation of beacons for plaster without problems) into the mortar bed.This will avoid profile deflections. For other types of finishes, it is preferable to exhibit profiles in mortar moldings. So, you get a continuous homogeneous plastered surface, in addition, the occurrence of cracks near the lighthouses will be excluded.
- To create sculptures, gypsum mortar is usually used, which requires speed in work, since it hardens in a matter of minutes. You can start plastering work as soon as lighthouses are displayed.
- In the event that the beacons are installed on a simple plaster mixture, then you need to wait a time sufficient for the mortar to solidify before proceeding with the further plastering of the wall.
Caution: The compatibility of materials should be considered. When using gypsum mixture for fixing beacons, plastering work should be continued only with gypsum-based mortar.
- Another way to install beacons is to use kapron dowels and screws, for which holes are drilled in the wall. The sequence of work is similar: we fix self-tapping screws for extreme profiles, and then for intermediate ones.
- Although the process of screwing screws into the wall is longer, but it facilitates the subsequent work, making it also more accurate. It is not difficult for any contractor to align the heads of the self-tapping screws vertically: you just need to slightly tighten them and check for accuracy with the building level.
- You can screw fasteners slowly - this is not quick-setting gypsum. After the fasteners are screwed in and checked for evenness, we proceed to throw mortar sculptures, onto which we then rub the profiles of the beacons on top. We try to do the work carefully, without much effort, in order to prevent the profile from bending.
Priming the work surface
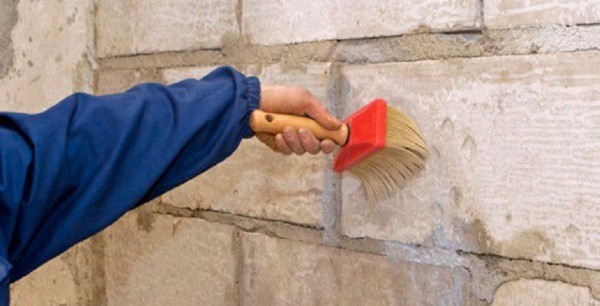
The alignment of the wall with plaster should be done on the primer (see Why do we need a primer: technological nuances of finishing work) It will make the adhesion of surfaces more durable and durable. The most common surface treatments are liquid primers.
Caution: They are applied to the wall to improve adhesion, thereby increasing the adhesion of the plaster layer to the surface material. There are two types of primers: for the primary processing of the wall and for increasing the adhesion of certain layers of plaster.
- When buying a primer, you should pay attention to its technical characteristics, for what surface it is intended: concrete, brick, wood. When choosing a primary primer, we focus on the wall material, i.e. from which it was built. And for the intermediate solution, the material of the plaster layer is important.
- Usually information about the intermediate primer, its name is indicated in the instructions for the dry mix for plaster (which we use as a working solution). In the event that the name of the intermediate primer is not indicated on the package of dry plaster, then ordinary water can be used by default.
- An important point: before proceeding with the priming of the walls, surfaces that are susceptible to fungal diseases, special chemicals, and solutions should be treated.
- To apply the primer, use a brush, roller or spray gun. A moisture-absorbing substrate should be treated twice. The primer allows you to even out the absorbent properties of the wall, which best affects the final result of plastering. If you leave the surface untreated, then it will draw all the moisture out of the plaster, leading to its premature drying.
- For brick walls, priming with plain water is allowed. In this case, the base material is saturated with moisture, so in the future it will draw less fluid from the plaster, and this will allow the solution to set in a good quality.If water is taken as a primer, then plastering is started immediately, following the “wet on wet” method.
- For a wooden or concrete wall, it is advisable to use a special type of primer. At the same time, we carefully read in the instructions about the need to allocate time for its drying.
Preparing the plaster for work
We level the walls with plaster using a mortar or using a dry finished mixture. Most often, a dry plaster mix is used to level the surface.
It is of two types, depending on the main binder used:
| Gypsum plaster | This mixture is ideal for work in a living room with a normal level of humidity. Gypsum-based plaster is distinguished by a high degree of vapor and air permeability, in addition, the acidity of gypsum is similar to the acidity parameters of human skin (see Dry plaster gypsum mixture: features of use). |
| Cement | A dry mix based on cement creates a dense layer of plaster, while it is well suited for rooms with high humidity, such as a bathroom or kitchen. |
Attention: When choosing a dry mix, it is worth paying attention to the parameters of the thickness of the plaster layer recommended by the manufacturer. Suppose you need a 5 cm leveling layer, and on the package it appears that the recommended layer thickness is not more than 3 cm. In this case, 2 layers of plaster will have to be applied, which will increase the consumption of materials, time. Therefore, when choosing a dry mixture, try to find the parameters that suit you.
Preparation of working plaster
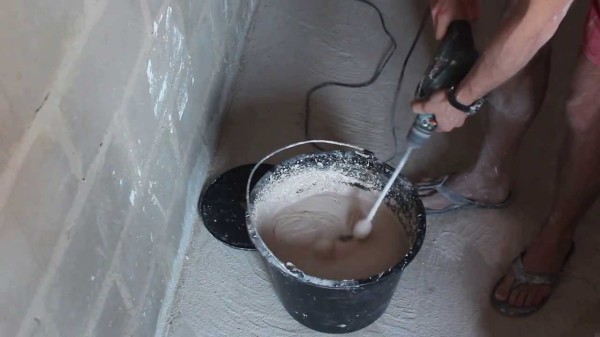
As a rule, a large amount of mortar is required to level the wall, so an appropriate container will be needed. The components can be mixed manually or using a drill with a special nozzle.
When creating a solution, you must strictly follow the manufacturer's instructions:
- Pour the dry mixture into the container, add the recommended amount of water exactly in the volume indicated. This is very important because polymers are present in the dry mixture, which begin to give off their properties to the mixture in strict proportion. The amount and composition of polymeric substances for each manufacturer is its own, which is a secret. The quality of the plaster and, as a result, the appearance of the walls depend on compliance with the manufacturer's recommendations.
- Mix the components thoroughly until a homogeneous mass is obtained.
- Leave for a while to allow the polymers to swell, then mix again.
- The mixture is ready, you can get to work. It is forbidden to add water or an additional portion of the dry mixture to the resulting solution, as this leads to an imbalance of proportions.
Note: Some craftsmen still ignore these rules, sometimes successfully. So, they are trying to get a solution with the required properties. It is noticed that a fluid, movable plaster mix sticks more securely to the wall. A thick solution allows you to create a thick layer, but there is a risk of poor adhesion.
- In this case, it is more advisable to apply two-layer plastering: first pour a liquid solution, dry it, and then apply a thicker mixture. If necessary, you can add a third layer.
- Before applying a new layer, be sure to wet the surface of the previous one. In construction terminology, these layers got their names - spray, soil, nakryvka. The surface of the first two layers is left rough.
The process of applying plaster to the wall
Plastering and leveling the walls is done in a specific order.
We divide all the work on leveling the surface into successive steps:
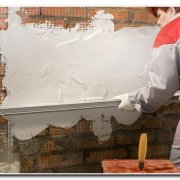
- We apply the first layer of plaster using a wide spatula. For convenience, you can take a narrow spatula 10-15 cm, with which we will impose material on a large one.
- We level the solution with the rule, performing movements in several directions: horizontally, vertically and diagonally. You can perform this work with a length of up to 12 cm and a half.
- The first layer should not be well leveled, on the contrary, the presence of roughness is encouraged. So, better adhesion with the following will be ensured. Leave the plaster to dry during the day.
- Dust off the first layer, performing a light primer with water. For the second layer, it is necessary to withstand a thickness of 5 mm.
- The process of applying the second layer is similar to the previous one, but there is one difference - now the plaster is carefully aligned with beacons. As a rule, we carry out the movement between the beacons from the bottom up, be sure to remove the excess mixture.
- With a spatula, we collect the removed plaster mortar and throw it on the wall surface in those places where there are holes that were not captured by the tool. We repeat operations on the entire surface of the wall, between the beacons.
- The rule of thumb going from the bottom up is very convenient: the mixture does not fall to the floor. But sometimes, when the layer is very thick, it can creep down, and a tubercle appears on the wall. To correct the situation, you should make the movement a rule in the opposite direction, that is, down. The appearance of pits is not excluded, but they are preferable to mounds. The pits are easily putty, but with the mounds more complicated - they will have to be knocked down and polished.
- Broaches - traces that remain from grains and dried lumps of plaster, correct by puttying. The surface roughness is eliminated during the grouting process. Avoiding a large number of broaches helps the complete removal of the solution with a spatula from the rule, as well as its frequent washing with an old bald brush during operation.
- Before the plaster dries, at the time of setting we check it with a rule in all possible directions and in various places. Discard the discovered tubercles immediately using a grater, putty knife or rule.
- The corners will be even if plastering one wall, give it time to dry, and only then start working with the second wall.
- When plywood beacons are used, they must be removed after setting the second layer. We cover the left hollows with plaster mortar. If it is supposed to be finished with tiles, the beacon profiles remain forever under a layer of plaster - they do not need to be taken out.
- When it is planned to stain or sticker the wallpaper, the metal profiles should be removed. This is due to the fact that there is a risk of peeling the protective layer from the profiles, and this leads to the formation of rust. Rusty spots can appear on a clean finish.
- Further actions depend on what type of finish will be used: when tiling, the plaster is left as it is. To sticker the wallpaper, the plaster layer is rubbed with a grater, and for painting the surface is also prepared for puttying, for which it is well rubbed and evened. I want to say that even under the wallpaper you can perform puttying of the surface, then the quality of pasting will increase several times.
- After waiting for the upper layer of plaster to set, we proceed to grout. With the help of it, we remove the traces of the rule, align the formed hillocks, holes. We spray strongly dried plaster with water and wipe it. But do not overdo it, as the wet plaster layer will be difficult to wipe. The purpose of the grouting process is to make the surface even and smooth, to eliminate all mounds, holes, traces from working tools.
- Grouting is done with a moistened sponge round and apart. In order for the wall surface to become perfectly smooth, you should repeat the grouting process again, but without losing time - it takes no more than a day from the moment the plaster mixture sets. The plaster is pre-wetted.The second smoothing and drying gives the effect of a glossy surface, which is ideally prepared for putty and provides high-quality staining.
How to align the plastered walls you now fully understand. It is not in a hurry, it is better to use high-quality material for work. So look at the photo and feel free to get to work.
