Wet waterproofing primer

During the construction or overhaul of premises subject to moisture, it is necessary to consider high-quality hydraulic protection of structures. These include bathrooms, basements, loggias, saunas, as well as objects located in the open air.
So that the floors and walls do not collapse from the effects of water, so that it does not leak to the neighbors in the event of a flood, a hydrobarrier is arranged, an important element of which is a waterproofing primer.
The content of the article
The order of the device hydrobarrier
Waterproofing works are carried out either in the process of building a new facility, or during the overhaul of the old one. That is, if you decide to change the tile in the bathroom, then it will be removed with the solution, while the old waterproofing will be violated.
Therefore, the coating is removed completely, together with the screed, to the concrete base, after which all waterproofing and finishing work is carried out anew, in layers.

It is important. In rooms where there is a high risk of leaks, instructions for waterproofing walls and especially floors should be strictly followed. This will save you in case of trouble from unnecessary expenses for repairs in the apartment of neighbors below.
In total, your “pie” should have at least four layers:
- Waterproofing primer;
- Layer of waterproofing roll;
- Cement strainer;
- Tiles or other flooring.
About the first, very important layer, we will tell in this article. About why it is needed, how it is applied, as well as the types of water-repellent primer.
All about waterproofing primer
The described material is a thick opaque liquid that penetrates the surface structure and forms a water-repellent film upon drying.
How it works
In general, any primer is primarily intended to give materials maximum adhesive properties. In other words, it is used to improve the adhesion of the layers to each other, which directly affects the quality and durability of the coating.
But waterproofing primer in bathroom, a sauna or other wet room should also have water-repellent properties, not to allow water to penetrate into the material. Penetrating into the smallest pores and cracks of concrete, brick or drywall, seeping through the wood fibers, it fills them, and then crystallizes and becomes a barrier to moisture.

At the same time, the base is strengthened, monolithic, and not absorbed, the substance remaining on the surface forms a film with high adhesive properties.
Tip. Doing repairs yourself, carefully choose a primer. It must be not just deep penetration, but waterproofing.
How to choose the right composition
Waterproofing primers are made on a different basis:
- Alkyd;
- Acrylic
- Mineral
- Polystyrene;
- Phenolic etc.

Among them there are those that have only adhesive properties, they are applied to durable waterproof surfaces, for example, plastered or painted with oil paint.
Others are also able to strengthen the surface, level it in front of the next layer.They are divided into ordinary and deep penetration, and are applied before applying tile adhesive, decorative plaster or other thick coating.
- A conventional waterproofing primer penetrates the bathroom into the top layer of the base to a depth of 3 cm;
- A deep penetration primer is able to glue a layer up to 10 cm thick.
Note! For internal work, only mineral, acrylic and alkyd compounds can be used. The rest contain toxic substances and are used for waterproofing outdoor structures.
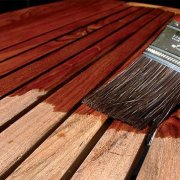
How to apply a primer
If you watch the video posted here, you will see that there is nothing complicated in this work. The main thing is not to leave unprocessed areas so that the waterproofing film does not have tears.
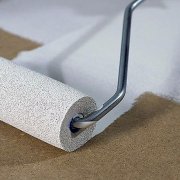
For application, you can use a roller, brush or spray, a mineral primer is often applied with a spatula, like putty.

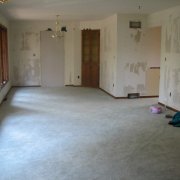
But before starting this work, the surface must be prepared:
- Remove rubbish, sweep and vacuum;
- Seal with the solution all large potholes, cracks and seams between the plates;
- Degrease oil stains;
- If the surface is wet, dry completely.
As a rule, the waterproofing primer in the bathroom is applied at least in two layers, since the first is absorbed into the material almost completely. The second, and if necessary the third layer, is applied to a dried surface.
It is possible to continue finishing work after the completion of priming not earlier than after 10-12 hours - this time is required for the water-repellent properties of the composition to manifest.
Note. To enhance the effect, the primer can also be added to the tile adhesive or plaster, but it should be no more than 4 percent in it.

When working with a primer, the following rules must be observed:
- Apply only at an ambient temperature of +5 to +25 degrees;
- If the composition was frozen, it is thawed in vivo, at room temperature, avoiding heating;
- You should always study the instructions on the packaging and clearly follow it. Dilute concentrated formulations strictly in the specified proportions and with the recommended solvent;
- When working, gloves, protective clothing and other personal protective equipment must be used.
Conclusion
Everyone knows that the price of repairs in a small bathroom often it turns out yours than the cost of finishing a spacious living room. And it can be incredibly insulting if the tile suddenly falls off the walls, and the slightest leak turns into compensation for the repair of neighbors.
To avoid this, do not neglect such an important stage of work as surface priming and waterproofing.